You can use project and activity triggers to send out e-mails and automatically change an attendee's activity status.
»To define an activity trigger
- From the Project Management window, click
 on the toolbar to launch the Project Activity wizard.
 - Click Next to navigate through the pages of the wizard to get to the Activity Triggers page.
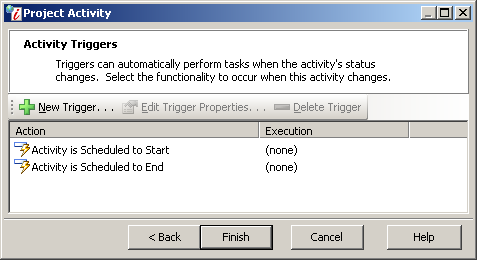
Activity Triggers Window
- Click
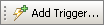 on the toolbar or select a trigger and click
  on the toolbar to open the Trigger Properties window.
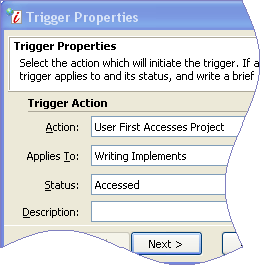
Trigger Properties Window
- Enter information about the event that will launch the trigger in these fields:
- Action: Select the action that will launch the trigger:
- Bidder submits a question
- Administrator Submits Answers
- User Views the Forum
- Event Document Status Changes
- Survey Status Changes
- Survey Response Status Changes
- Survey Evaluation Status Changes
- Users Submits a Preliminary Bid
- Activity is Scheduled to Start
- Activity is Scheduled to End
- User Views Project
- Applies To: Some of the trigger Action types involve changes to a specific document, survey or project management activity. You can have many documents, surveys, and activities associated with a project but a trigger only applies to one object. Select the specific item that you want to launch the trigger from the drop down menu. The following action types require you to select an item in this field: Event Document Status Changes, Survey Status Changes, Survey Response Status Changes, Survey Evaluation Status Changes, Activity is scheduled to start, or Activity is Scheduled to End. For example, if you want to send an e-mail whenever a bidder submits a survey, select "Survey Response Status Changes" for the action, select which survey to associate with the trigger from the Applies To menu, then select the bidder response that will trigger the e-mail in the Status box.
- Status: If the selected Action type involves a status change, select the status that will launch the trigger. The following fields require you to select a status: Event Document Status Changes, Survey Status Changes, Survey Response Status Changes, Survey Evaluation Status Changes, and User Views Project.
- Description: Enter a brief description of the trigger.
- Click Next to open the Trigger Execution page.
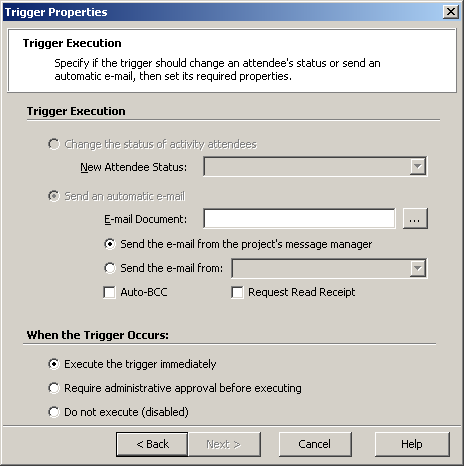
Trigger Execution Window
- Use the following fields to set up the resulting actions that occur when the trigger is executed:
- Trigger Execution: Choose which Iasta SmartSource action results when the trigger is launched. There are two options:
- Change the status of activity attendees: Iasta SmartSource will automatically change the status for each user (activity attendee) who is assigned to the Project Management activity. Select the status you want automatically applied to the attendees in the New Attendee Status field.
- Send an automatic e-mail: Iasta SmartSource automatically sends an email to users you specify as "trigger attendees" on the next page of the wizard. To create a new e-mail, click
 next to the E-mail document field to open the Create and Save an E-mail Document window where you can choose to use content from an existing e-mail template or create a new message. When you are finished selecting a template or writing a new message, click Save to return to the Trigger Properties window. To save the e-mail as a template, click TEMPLATES and select "Save Template."
NOTE: If you choose Send an automatic e-mail and leave the E-mail Document field empty, then click Next, the E-mail Document -- Blank Activity Template appears. When you use this template, you can include the following activity fields: Activity Start Time, Activity End Time, Activity Name
![]()
- When the Trigger Occurs: You can choose the following options to control the timing of the trigger execution:
- Execute the trigger immediately
- Require administrative approval before executing
- Do not execute (disabled)
- Click Next to open the Trigger Attendees page.
- Use these fields to determine who will receive the triggered emails or status modifications.
- Select Attendees: Choose the attendees who should receive the trigger e-mail or be affected by the status change. You can send emails to all attendees with a specific role by selecting the role check boxes or you can manually select individual users from the list of project attendees. NOTE: If the e-mail sender is removed from the database, the trigger status changes to "executed" but no e-mail is sent.
- Select Statuses: choose to whether you want to execute the trigger for selected attendees who currently have any status or whether you want to restrict it to those project attendees with a specific status. If you choose Only execute for attendees wit the following statuses, you must select one or more statuses in the check list in the lower right area of the window.
NOTE: If you are confirming receipt of a survey or preliminary bid, you should choose "The attendee who triggered the action" rather than "All Qualified Bidders." If available, you can also choose who should not receive the e-mail or status change based on an attendee's current status (see below).
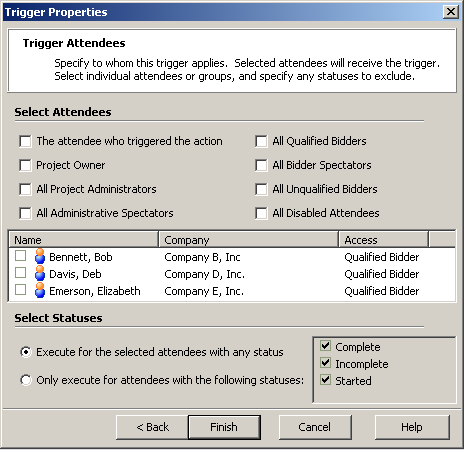
Trigger Attendees Window
- Click Next. If you chose to execute this trigger based on an action tracked in Iasta SmartSource, the Activity Triggers window appears.
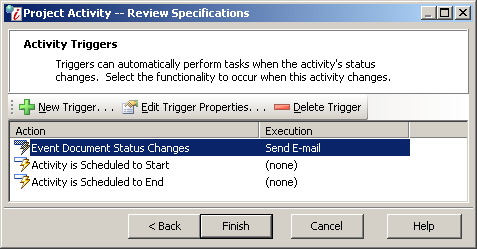
Activity Triggers Window
- If you chose to execute this trigger based on an action not tracked in Iasta SmartSource, you must define the trigger execution time(s).
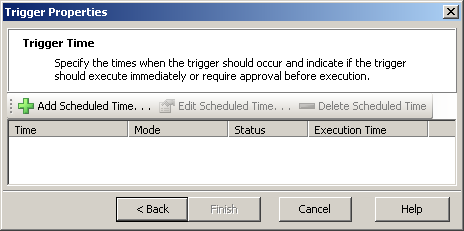
Click ![]() on the toolbar or select an existing trigger time and click
on the toolbar or select an existing trigger time and click ![]() to open the Schedule the Trigger Time window.
to open the Schedule the Trigger Time window.
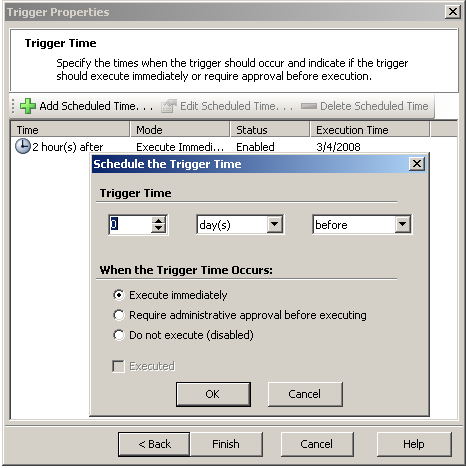
Trigger Time Window and Scheduling Window
Define the trigger time relative to the event and choose when the trigger time should occur. Click OK to return to the Trigger Time page. Add additional trigger times as needed and click Finish.
- Continue adding activity triggers. click Finish to exit the New Activity wizard.