Excel bidding allows bidders to submit quotations through your own customized pricing workbook. Excel bidding is very helpful when you want to collect bids for many lots because it saves bidders from submitting individual bids manually for each lot. With Excel bidding events (either sealed bid or auction), bidders can simultaneously submit offers on all lots when they upload their pricing workbook.
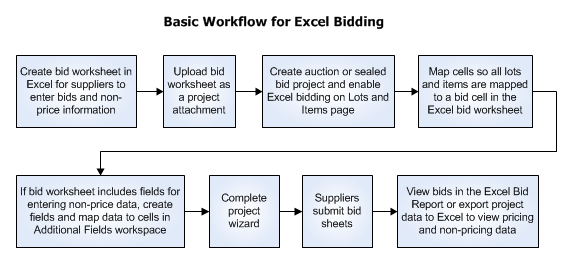
To use Excel bidding, you must provide bidders with a spreadsheet that has been mapped to the lots in your project. Generally, Project Administrators include Excel bidding spreadsheets as attachments in a project. Before enabling Excel Bidding for your project, you should create the bidding worksheet in Excel.
If you are using formulas in the Excel file, Excel bidding will enable bidders to submit bids using the formulas. For more information about using formulas in your bidding spreadsheet, refer to Using Formulas in Bidding Spreadsheets.
To review Excel bids after the Live Event, use the Excel Bid Report or export project data to Excel.
»To enable excel bidding
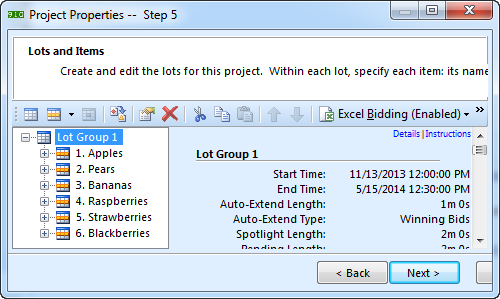
- From the Create New Project wizard or the Project Properties wizard, click Next to navigate to the Lots and Items window or click Edit Project on the toolbar and choose Lots and Items. Create the lots and items where you want vendors to submit bids. It should match the information in your Excel bid worksheet.
- Click
 on the toolbar and select Enable Excel Bidding to open the Map Lots and Items to Excel Cells window.
- Click
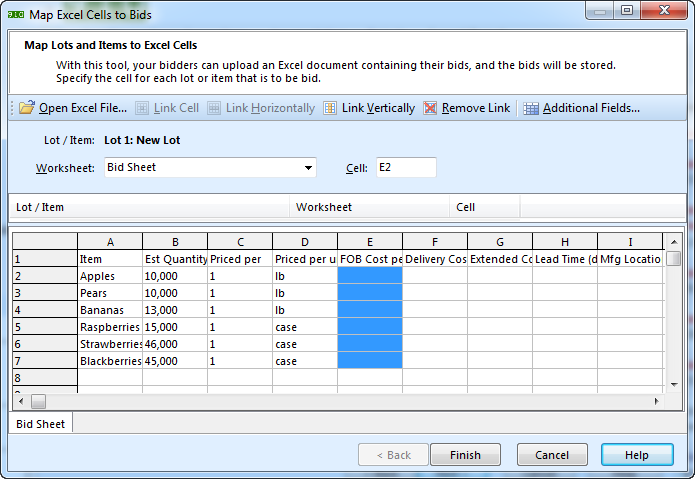
 on the toolbar, select the file that contains your Excel bidding worksheet, and click Open to open the spreadsheet in the bottom area of the Map Lots and Items to Excel cells window. For instructions on how to create an Excel bidding template, see Creating an Excel Bidding Template.
 - From the Worksheet box, select the worksheet (spreadsheet tab) you want to work with. You can only map one worksheet (spreadsheet tab) at a time.
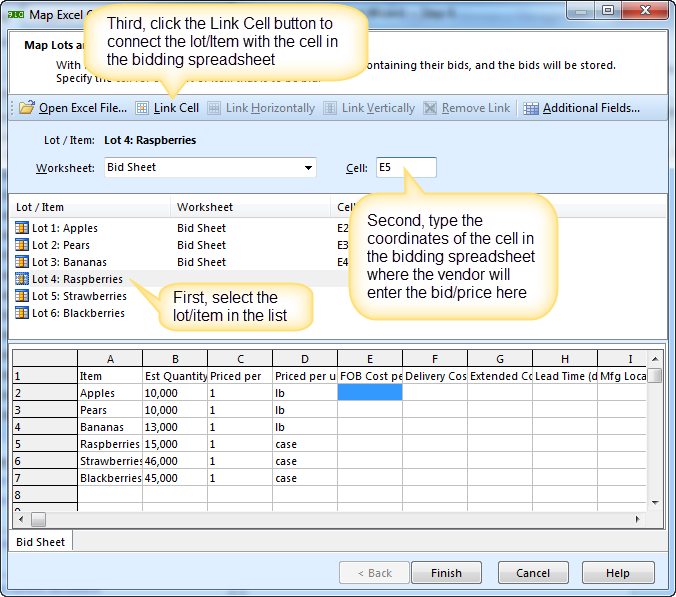
- Select a lot or item in the Lot/Item column. In the Cell box, type the coordinates for the cell where the bidder will enter (type) the bid for the selected lot or item from the spreadsheet and click
 on the toolbar. The cell coordinates display in the Cell column for the selected lot or item.
- Continue mapping cells until all lots and items are mapped to the cell where vendors will enter the bid in the worksheet. Depending on how your bidding sheet is organized you may be able to accelerate the mapping process by mapping multiple cells at the same time with the Link Vertically or Link Horizontally buttons. See the Mapping Multiple Cells Horizontally or Vertically section on this page for more information.
- If your bid sheet includes cells for collecting non-price data such as lead time, manufacturing location, color, etc, you will need to add fields for displaying the data entered on the Excel Export. Non-price fields are configured by clicking the Additional Fields button. See Collecting Additional Information from Excel Fields for detailed instructions.
- Click Finish to return to the Lots and Items page where you can complete the project wizard.
- Don't forget to attach the bidding spreadsheet so that vendors can access it.
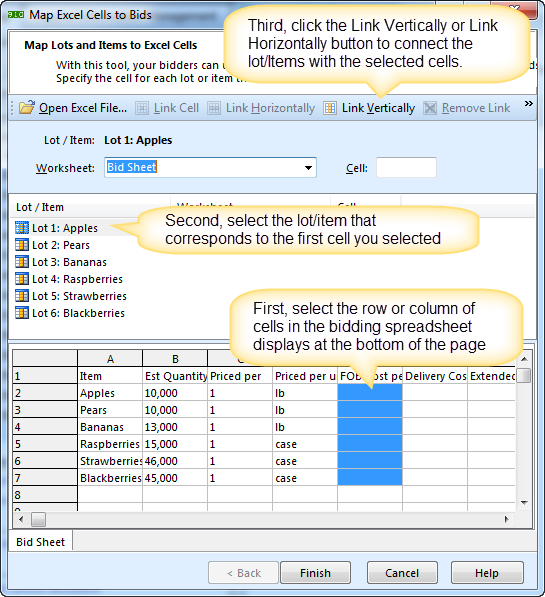
»Mapping multiple cells horizontally or vertically
- From the bottom (spreadsheet) section of the Map Lots and Items to Excel Cells window, select a series of cells you want to map (either vertically or horizontally).
NOTE: Make sure there are no empty cells in the series.
- In the Lot/Item column, select the lot or item you want to map to the top or left-most cell you selected.
- Based on the configuration of cells you selected, click
 or
or  on the toolbar.
Related Topics
Creating an Excel Bidding Template