»To set up a survey
- Select and expand the project in the Connections and Projects tree and click the Surveys button
 on the toolbar to open the Survey Management window.
 - Click
 on the toolbar to open the Survey Properties page.

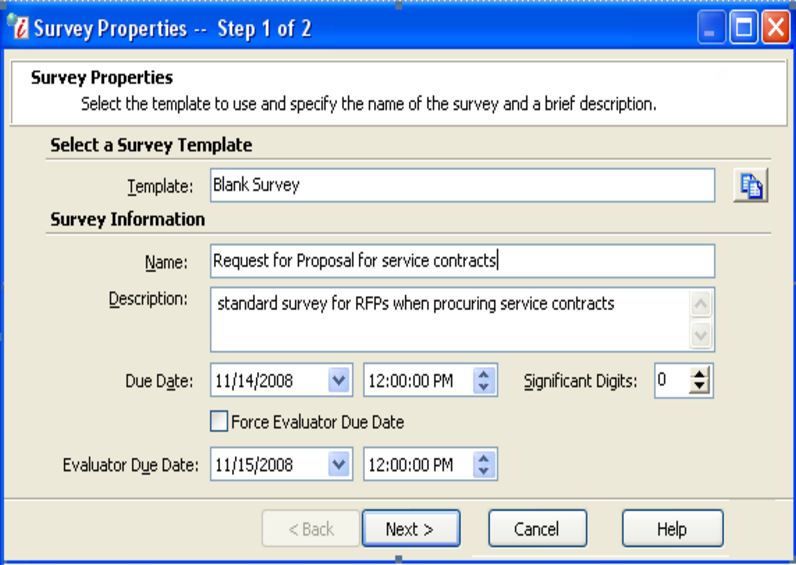
Survey Properties Window
- Enter information in the following fields:
- Template: click
 to open the Document Library Survey Templates window. Select the Standard Template and click Finish.
 - Name: Enter a brief descriptive name for the survey.
- Description: Enter a description of the survey.
- Due Date: Enter the time and date by which all respondents must submit their responses to the survey. Respondents cannot submit responses after the survey's due date has passed.
- Significant Digits: Select the number of places to the right of the decimal point for the minimum and maximum values for numeric questions in the survey (optional). The number of significant digits equals the number of decimal places used beyond the rounded whole number. For example, an amount with a significant digit of "2" will display (and used in calculations) with two decimal places (rounded to the nearest 100th).
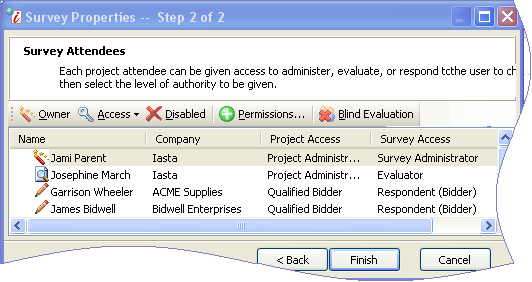
- Click Next to open the Survey Attendees window listing the project attendees.
- To assign survey roles to project attendees, select the attendee's name and click one of the following Survey Roles buttons on the toolbar. NOTE: Attendee's role in the survey does not have to correspond to his or her project access.
 : View, edit and evaluate the survey, as well as view and edit responses and reports.
  : View and edit evaluations to survey responses. You can only assign sponsor users as survey evaluators.
NOTE: To apply weighting to evaluator responses, refer to Weighting Evaluators.
 : View and respond to the survey.
 : Cannot view, respond to, or evaluate the survey.
 : The selected attendee is restricted to viewing and evaluating the survey but the names of respondents during the evaluation process are hidden. (Respondents will appear as "Respondent A," "Respondent B," etc.)
NOTE: Users must be project attendees in order to participate in the survey. If you want to invite more users to the survey, create user accounts in the Companies and Users window and then add them as attendees in the project before allowing them access to the survey. When you add new attendees to a project after a survey has been created, you are prompted whether to add them as respondents or evaluators.
NOTE: You can designate a qualified bidder as a respondent but not an evaluator. However, you can designate a spectator as either a respondent or an evaluator.
- Click Finish to return to the Survey Editor showing the sections and questions pulled from the Standard Template.
The Survey Editor enables you to customize the template to your specific needs. The Survey tree in the left pane, shows the survey sections and questions. Use fields in the right pane to edit questions. The right pane contains three tabs: Design, Preview, Report. Use the Design tab to build the content and design of the survey questions. Use the Preview tab to see how the question will appear to respondents when they complete the survey. Use the Report tab to preview the entire, finished survey before you publish it.
- Select the section or question you want to modify in the left pane then edit the fields in the pane or use the following toolbar buttons to create new survey content:
![]() : Add a new section. Due to Excel formatting rules, if you plan to export the survey to Excel, section names should not be blank.
: Add a new section. Due to Excel formatting rules, if you plan to export the survey to Excel, section names should not be blank.
![]() : Add a new question or subquestion.
: Add a new question or subquestion.
![]() : Add a new table question. Table questions are a set of nested questions in a matrix format. Each cell in the table is actually its own question. For survey scoring, the table as a whole counts as one question.
: Add a new table question. Table questions are a set of nested questions in a matrix format. Each cell in the table is actually its own question. For survey scoring, the table as a whole counts as one question.
![]() : Adds a multiple-choice questions
: Adds a multiple-choice questions
![]() : Inserts a hyperlink or attachment to a question
: Inserts a hyperlink or attachment to a question
You can copy a question or section by selecting the section or question in the Survey tree, right clicking and selecting Copy, navigating to the destination for the duplicate section or question (either in the same survey or a different one), right clicking and selecting Paste.
- Enter the weight specifications for the Survey's questions, sections, and evaluators. Sections of questions and individual evaluators can be differentially weighted to calculate a weighted average bottom-line score. You can modify weightings throughout the survey process and your changes will be reflected immediately in reporting and analysis. So, feel free to change the weighting at any time.
- Question Weight: This setting allows another level of weighted average scoring by allowing different questions to carry different weights while still permitting evaluators or the AutoScore feature to score arbitrarily. By default, every question accepting a score has an equal weighting of 10.
- Section Weight: All weighted sections must total 100%. If you manually set a section's weight, Iasta SmartSource divides the remaining sections' percentages equally, having all sections total 100%. A higher weighted section gives a section more value when totaling a score to 100%.
- Click
 on the toolbar and choose from the saving options, i.e. saving the survey as a template.
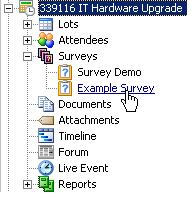
The survey will now appears under the Surveys node of the project you are working with:
- Click
 on the toolbar and select "Publish to All."
 - When you have finished setting up your project, change the project status to a Published status. For more information, refer to Project Statuses.
- Invite attendees to the project. For more information, refer to E-mailing Project Invitations.