Sealed bid projects are created using the same steps as regular auction projects. Bidders can use the software to submit private bids prior to the sealed bid deadline. Project Administrators can then decide whether or not to promote the project into a full reverse auction scheduled for a later date, or to use the results of the sealed bid process.
Characteristics of sealed bids include:
- Non-competitive
- Asks for the best and final offer at one time
- No bid or bidder ranking
- Usually open for a long period of time; most leisurely method of auction
Note: there is a High-Security option that keeps sealed bid data hidden from all users until formally unsealed. This option is turned on and off at the subdomain.
»To add sealed bids
- In the Sourcing workspace, expand the project in the Connections and Projects tree, open the Edit Project menu on the toolbar and choose
 Bid Management.
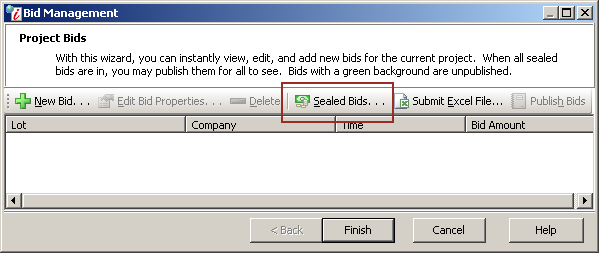
Project Bids Window
- Click
 on the toolbar to open the Sealed Bids window.
NOTE: The Sealed Bids button is available for project with a reverse or forward sealed bid project type.
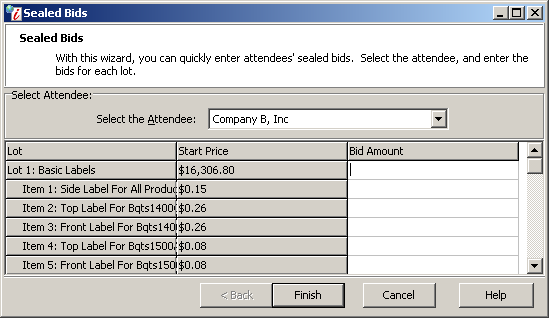
Sealed Bids Window
- In the Select the Attendee field, select the attendee who submitted the bid.
- In the Bid Amount column, type the bid for each lot and/or item.
- Click Finish to return to the Project Bids window.
- Click Finish.
Related Topics
Submitting an Excel Bid Spreadsheet