Create a personalized dashboard by choosing gadgets and adjusting the layout.

»To design your personalized Iasta SmartSource dashboard
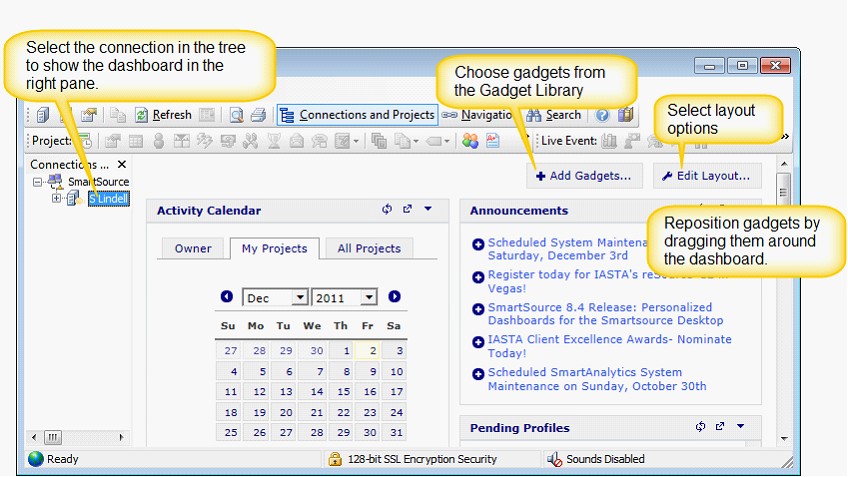
- Open the Iasta SmartSource Desktop and expand the branch for your connection in the tree.
- Click the Add Gadgets button on the dashboard to open the Gadget Library. Click Add for each gadget you want to put on the dashboard then click Finish.
- The selected gadgets are now on your dashboard. Click the Edit Layout button to select from pre-determined formats. Select a layout and click Close.
- Adjust the layout. Take a look at the gadgets. There are several ways you can modify the size and presentation of gadgets on your dashboard:
- Move gadgets around. Drag gadget to different positions. Keep in mind what information is most important to you and the amount of space you need to see the critical information. You may want to try several different layouts to see which works best for the density of your data and the gadgets you have chosen. Generally you will want to put gadgets with broad horizontal data in a wider column.
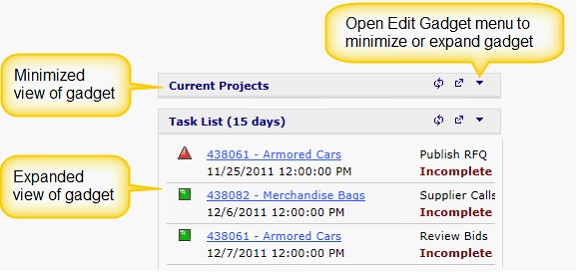
- Minimize and expand gadgets: Change your dashboard by minimizing a gadget so that only the title bar of the gadget window appears. Keeping a gadget on your dashboard in a minimized state allows you to stay a single-click away from the information without it taking up valuable dashboard real estate.

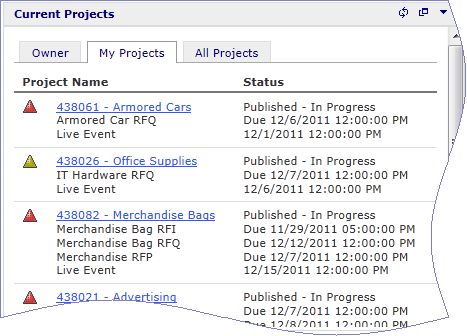
- Maximize the gadget: Maximize a gadget when you want to enlarge it to fill the entire dashboard pane. Only one gadget can be maximized at a time.
- Remove and add gadgets: Remove and add gadgets from the dashboard whenever you want. Remove a gadget by opening the drop down menu with the arrow button in the upper right corner of the gadget and selecting "Remove this gadget". Add a gadget with the Add Gadget button.

Related Items
Contract Search Results Gadget