Designing Surveys
The general process for building a survey consists of 3 basic steps:
- Step 1: Define survey properties
- Step 2: Customize the survey template
- Step 3: Save and publish the survey
Using a template can minimize the time it takes you to create a survey. When you start from a template, Iasta SmartSource populates your survey with sections and questions in the template but you are able to add, remove, and edit sections and questions before saving the survey.
»To define survey properties
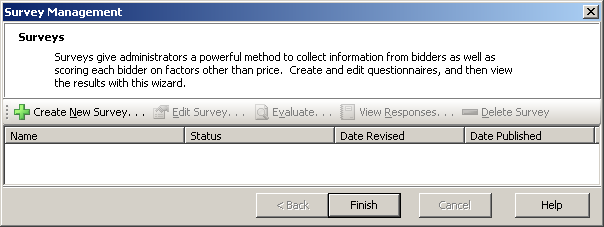
- Select and expand the project in the Connections and Projects tree and click the Survey Management button
 on the toolbar to open the Survey Management window.
- Click
 on the toolbar to open the Survey Properties window.
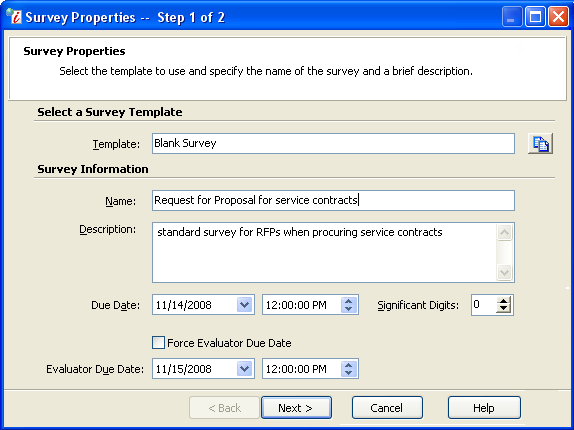
Survey Properties Window
- Enter information in the following fields:
- Template: Click
 to open the Survey Templates category of the Document Library. Select a survey template and click Finish to return to the Survey Properties page.
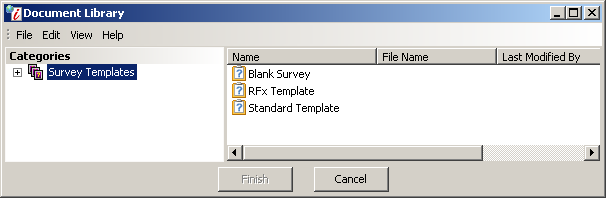
Document Library Window
NOTE: The first time you create a survey, it is helpful to choose the Standard Template. If you like, you can modify it and save it as a new template for future use. You can also work on templates by accessing them directly through the Document Library.
- Name: Enter a brief but descriptive name for the survey.
- Description: Enter a detailed name for the survey. The description appears below the survey name on the project summary page. The description can provide helpful information to respondents and evaluators. (optional)
- Due Date: Enter the date and time by which respondents must submit their responses to the survey.
- Significant Digits: Select the maximum number of digits to the right of the decimal point be used or displayed for:
- minimum and maximum scores as well as AutoScore options for numeric questions
- question weights within the section and section weights within the survey
- evaluator scores
- Manage survey evaluations: Enter the date and time by which evaluators should submit their evaluations for each survey response.
- Force Evaluator Due Dates: Select this option if you want to treat the Evaluator Due Date as a required date. Evaluators will not be able to submit Evaluations after the date entered in the Evaluation Due Date field on this page.
- Evaluator Due Date: Enter the date and time by which evaluators should submit their evaluations for each survey response.
- Click Next to open the Survey Attendees page.
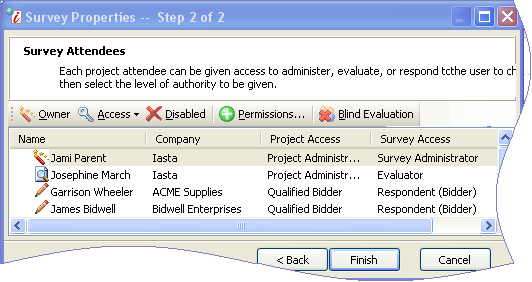
Survey Attendees
- The Survey attendees page lists all project participants. A user must be a project attendee to be assigned access to a survey. Select an attendees name and then click one of the following toolbar buttons to assign the project attendee access to the survey. Survey access is specific to a survey. It is not the same as project access.
 :Each survey must have one owner. There cannot be more than one owner. Any project participant from the sponsor company can be assigned as the owner.
  : Assign the attendee to one of the following survey roles:
- Survey Administrator: View, edit and evaluate the survey, as well as view and edit responses and reporting.
- Evaluator: View and evaluate the survey. (Sponsor users only)
NOTE: To apply weighting to evaluator responses, refer to Weighting Evaluators. - Respondent (Sponsor): View and respond to the survey.
- Respondent (Bidder): View and respond to the survey
 : Enable/Disable currently selected user.
  : Opens the Override this User's Permissions page so that you can manually adjust the permissions of the user for this survey or export a file to record the user's survey permissions. Only users who have been assigned the Override roles permission for the project (via a project or system-wide role) can override permissions for survey users. Additionally you can only assign a permission which you have access to grant.
  : Applying Blind Evaluation to an attendee allows the attendee to view and evaluate the survey but hides the names of respondents during the evaluation process. (Respondents will appear as "Respondent A," "Respondent B," etc.)
NOTE: You can designate a qualified bidder as a respondent but not an evaluator. Spectators can be designated as either respondents or evaluators.
- Click Finish to open the survey in the Survey Editor window.
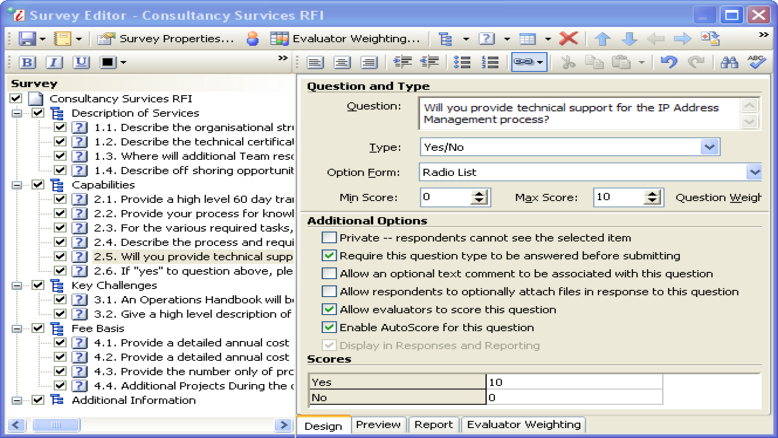
Survey Editor Window
»To customize the survey template
Survey sections and questions appear in the Survey tree in the left pane of the Survey Editor. You can enable or disable sections and questions by selecting their check boxes in the Survey tree. You can also use the Survey tree to copy and paste sections and questions. See the following topics for more detailed information on working with survey questions and sections in the Survey Editor:
»To save and publish the survey
- Click
 on the toolbar and select "Save." You must have at least one question selected to save the survey. The saved survey appears in the project's Surveys branch in the Connections and Projects tree.
 - When you initially create a survey it is unpublished. It will not be visible to other users until you publish it. Click
 on the toolbar and select one of the following publishing options:
- Publish to Evaluators: Only evaluators can access the survey. Evaluators cannot evaluate a survey until the response due date is past and/or all respondents have submitted their responses.
- Publish to All: Evaluators and respondents can access the survey if the project is in an Published status.
NOTE: Regardless of whether you have published the survey, non-sponsor users cannot view the survey for a project until the project is published. The status of unpublished surveys appears in bold red type on survey lists. See Project Settings for more information on publishing projects.
Making Changes to Published Surveys
You can make changes to surveys after publishing them. When you save the changes they will be available to users. You can make a survey unavailable (remove it from their view) to respondents, spectators and evaluators by unpublishing it.
Preview Tab
The Preview tab presents a preview of each question as it will appear to respondents. You can see the selected format for the question as well as any other options you have selected.
You can export information from the Preview tab to Word or Excel by clicking the Export button ![]() on the toolbar.
on the toolbar.
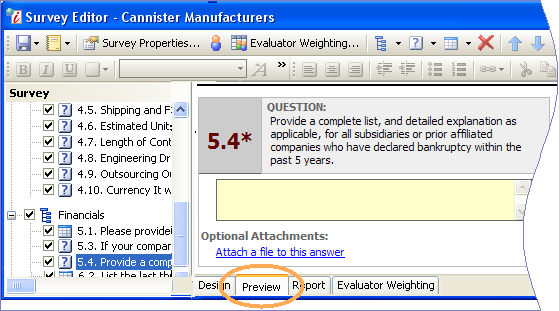
Survey Editor Preview Tab
Report Tab
The Report Tab contains a summary of the survey details in an easy-to-read report format. It enables you to view the entire finished survey before you publish it.
Export the information in the Report Tab to Word or Excel by clicking the Export icon ![]() on the toolbar.
on the toolbar.
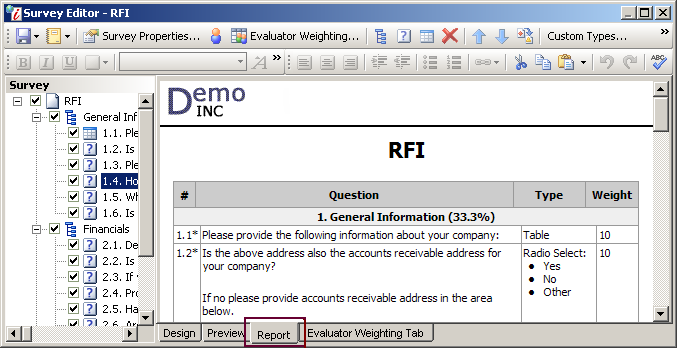
Survey Editor Report Tab
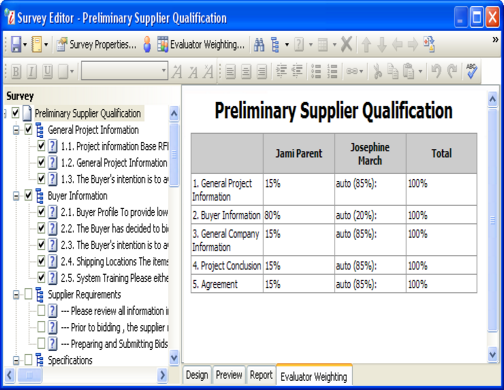
Evaluator Weighting Tab
See how different evaluator's scores will be weighted in the final survey score.
Related Topics